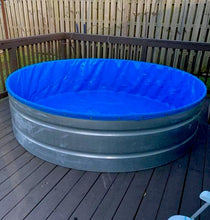
Select sizes 6' and 8' now in stock, arrives in 1-2 weeks!
Custom liners arrive in 3-4 weeks.
IMPORTANT: Please read EVERYTHING below. You must measure your tank's diameter with a tape measure before ordering.
Give Your Stock Tank a Glow-Up with Our Heavy-Duty Liners!
Who are these liners for? Oh, just the stock tank owners who refuse to give up on their beloved (but rusty, leaky, or corroded) tank dreams. If you’re ready to patch things up and don’t mind a little extra material, these liners are basically the tank equivalent of a second chance at love. 💙
What to Expect:
Sizing Magic: These heavy-duty liners come with a little extra wiggle room (think comfy sweatpants for your stock tank). They’ll fit, they’ll hold water, and they’ll transform your tank into a pool party MVP.
No Stretch, No Stress: They don’t stretch (sorry, no tank yoga here), but we make them slightly bigger so you won’t have a tight squeeze situation. Just measure the outermost diameter of your tank along the top, and round up if you’re between sizes. Too small? Send it back (just don’t cut or modify it first).
About the Liners:
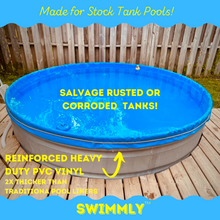
Made from 2X thicker PVC vinyl than your average above-ground pool liner (because your tank deserves the VIP treatment).
UV- and tear-resistant—perfect for sunshine and rowdy splash sessions.
Chlorine-friendly (but don’t let those chlorine tablets touch the liner directly unless you enjoy instant fade vibes).
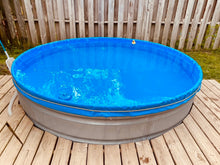
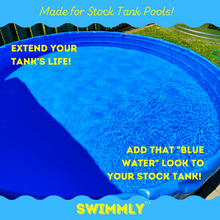
Available in the classic Sky Blue color, perfect for galvanized round tanks. Sorry, poly and oval tank fans—this one’s not for you.
Important Notes (aka Things You Should Know):
1. Measure twice, order once. Measure the top, outermost diameter and round up if needed.
2. Folds are normal. Think of it as your tank rocking a chic, draped look—it’s called fashion, sweetie.
3. Chlorinate responsibly. Overdoing it on chlorine may fade the liner, so stick with recommended levels and keep those tablets in a floater, not chilling on the liner like a dive toy.
Why Wait?
Your rusty stock tank isn’t going to fix itself. Order now, and in just 3–4 weeks, you’ll have a custom liner that keeps the water in and the backyard vibes immaculate. Let’s keep the splash alive! 🌊 Update: select sizes for 6' and 8' tank are now in stock and ready ship next business day.
Sizing: Let’s Get It Right, Folks
Believe it or not, no two stock tanks are exactly alike—kinda like snowflakes, but less magical and more metal. That’s why we custom-make each liner based on your tank’s measurements. Before you hit that order button, grab a tape measure and check the outside diameter of your tank.
Pro tip: Measure across the top, at the widest point, and then round up to the nearest inch. Yes, UP. Bigger is better in this case—because our tough, no-stretch liner material won’t budge once it’s made.
So if you’re off by half an inch too small? That liner ain’t going in. Too big? You’ll just get a few cute little folds.
Bottom line: measure like your summer fun depends on it. Because it does.
Guarantee: Before You Cut, Give It a Glance
We guarantee your liner is free from any manufacturing flaws—these things will hold water and improve the look of your tank. BUT... before you go cutting holes for pumps or jets or doing surgery with a box cutter, test it out.
Once it’s been sliced and diced, we can’t take it back—but the good news? It’s made of tough stuff and can be easily repaired with a PVC liner repair kit. Crisis averted.
Refunds & Returns: Custom = Commitment
Each liner is made just for you and your perfectly imperfect tank. That means once you order it, it’s yours—no backsies, no cancellations, no take-backs. So measure twice, order once, and get ready to live your best backyard pool life.
How to Install (AKA: Liner Day, Baby!)
Best done on a warm, sunny day—because sunshine makes the liner more pliable and way more cooperative. Cold days = regret.
-
Start fresh. Your tank needs to be clean and dry. Like, wipe-it-with-a-towel dry. Vacuum out all the sand, grit, pebbles, or mysterious things at the bottom.
-
Lose the extras. Remove all fittings, drain plugs, and any accessories you’ve tricked your tank out with.
-
Warm it up. Unbox the liner and let it sit in the sun. This makes it more flexible and way easier to wrestle into place.
-
Drop it in. Place the liner in the tank, press it into the corners, and roll the edge over the rim. This may take two people and a touch of patience (and maybe a margarita afterward).
-
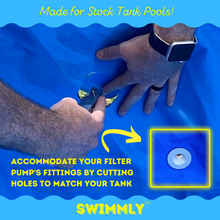
Cut to fit—carefully. If you’ve drilled holes in your tank, now’s the time to carefully cut the liner to match. Use a sharp utility knife and make sure the black rubber washer is between the fitting and the liner. Trust us on this one.
-
Fill ‘er up and jump in. That’s it. You did it. Go grab your floaties!
Interested in bulk or wholesale pricing? For orders of 10 or more, email us: help@swimmly.co.


